Welcome back to our occasional series, “How They Made It,” where we explore the food and drink of Outlander. This time we’re recreating Claire’s homemade peanut butter for journey cakes. Slainté!
(Note: some of the links on this page can be with affiliates that give me a small commission for my referral at no extra cost to you, and as an Amazon Associate I earn from qualifying purchases.)
Taking a journey
What snacks do you pack for a road trip?
Do you take candy and chips (or crisps in the UK)? Something healthy, like fruit and granola bars? If it’s a long trip, sandwiches for a roadside picnic?
Whatever it is, it’s food for a journey.
A quick Google search told me that journey cakes (or johnnycakes) are a cornbread flatbread (like a corn pancake) that originated from the indigenous people of North America. Their purpose is clear: a food that’s portable and won’t spoil quickly.
We know that Claire (and later, Brianna) had peanut butter & jelly sandwiches (or PB&J) for their trip through the stones. Easy to store and would keep for a while, those journey cakes were a smart choice. And those sandwiches were a reminder of home.
It was for that bit of nostalgia that Claire decided to recreate peanut butter & jelly sandwiches for her family in Episode 5.11, “Journeycake.” Before she knew that the MacKenzies were able to travel back through the stones, Claire wanted Jemmy to have a taste of the comfort food she had known in the 20th century. How would Claire have gone about bringing PB&J to the 18th century?
But first, some background (you didn’t think I would skip the history, did you?).

Claire serving her family her peanut butter and jelly sandwiches (photo credit: Outlander STARZ Season 5)
Peanut Butter — a history
Peanuts have been eaten for a long time. A very long time.
Originating in South America, there is evidence that “as early as 1500 B.C., the Incans of Peru used peanuts as sacrificial offerings and entombed them with their mummies to aid in the spirit life. Tribes in central Brazil also ground peanuts with maize to make a drink,”according to the National Peanut Board.
Spanish explorers brought peanuts to Spain, and from there it spread to Asia and Africa. It was Africans who introduced peanuts to North America in the 1700s (you can guess as to how and why they were there).
Peanuts are a tough crop to grow, and it wasn’t until the early 1800s that they were grown commercially in the US, and were used “mainly for oil, food and as a cocoa substitute. At this time, peanuts were regarded as a food for livestock and the poor.”
That explains Jamie’s comments about feeding Claire’s peanuts to the pigs.
It was Marcellus Edson of Canada who held the first US patent “representing the finished product created from milling roasted peanuts until they reached a fluid state” in 1884 (Culinary Schools.org), but Dr. John Kellogg (yes, of cereal fame) is credited for actually creating the process for making peanut butter in 1897. And Dr. George Washington Carver discovered over 300 uses for peanuts (including peanut butter) in the early 1900s.
The National Peanut Board tells us that “peanuts and peanut butter became an integral part of the Armed Forces rations in World Wars I and II. It is believed that the U.S. army popularized the peanut butter and jelly sandwich for sustenance during maneuvers in World War II.”
So we have the army to thank for American’s love of PB & J sandwiches.
Okay, enough of the history lesson. Let’s get to making old-fashioned homemade peanut butter!

The ordinary peanut butter sandwich has a long history. Who knew? (photo credit: Outlander STARZ Season 5)
Au Natural? You bet!
The beauty of the homemade peanut butter recipe Claire would have followed is its simplicity: take shelled and roasted peanuts and grind them up into a paste. That, in a nutshell, is it. (you had to go there?!)
Ok, she might have added a little salt and/or a little sweetener (like that honey Jamie and Briana brought home in Episode 4.09), but you get the idea.
Note, homemade peanut butter won’t be as smooth as commercial peanut butter, but it’s spreadable and yummy. Just think of all the preservatives, emulsifiers and additives you’re not using!
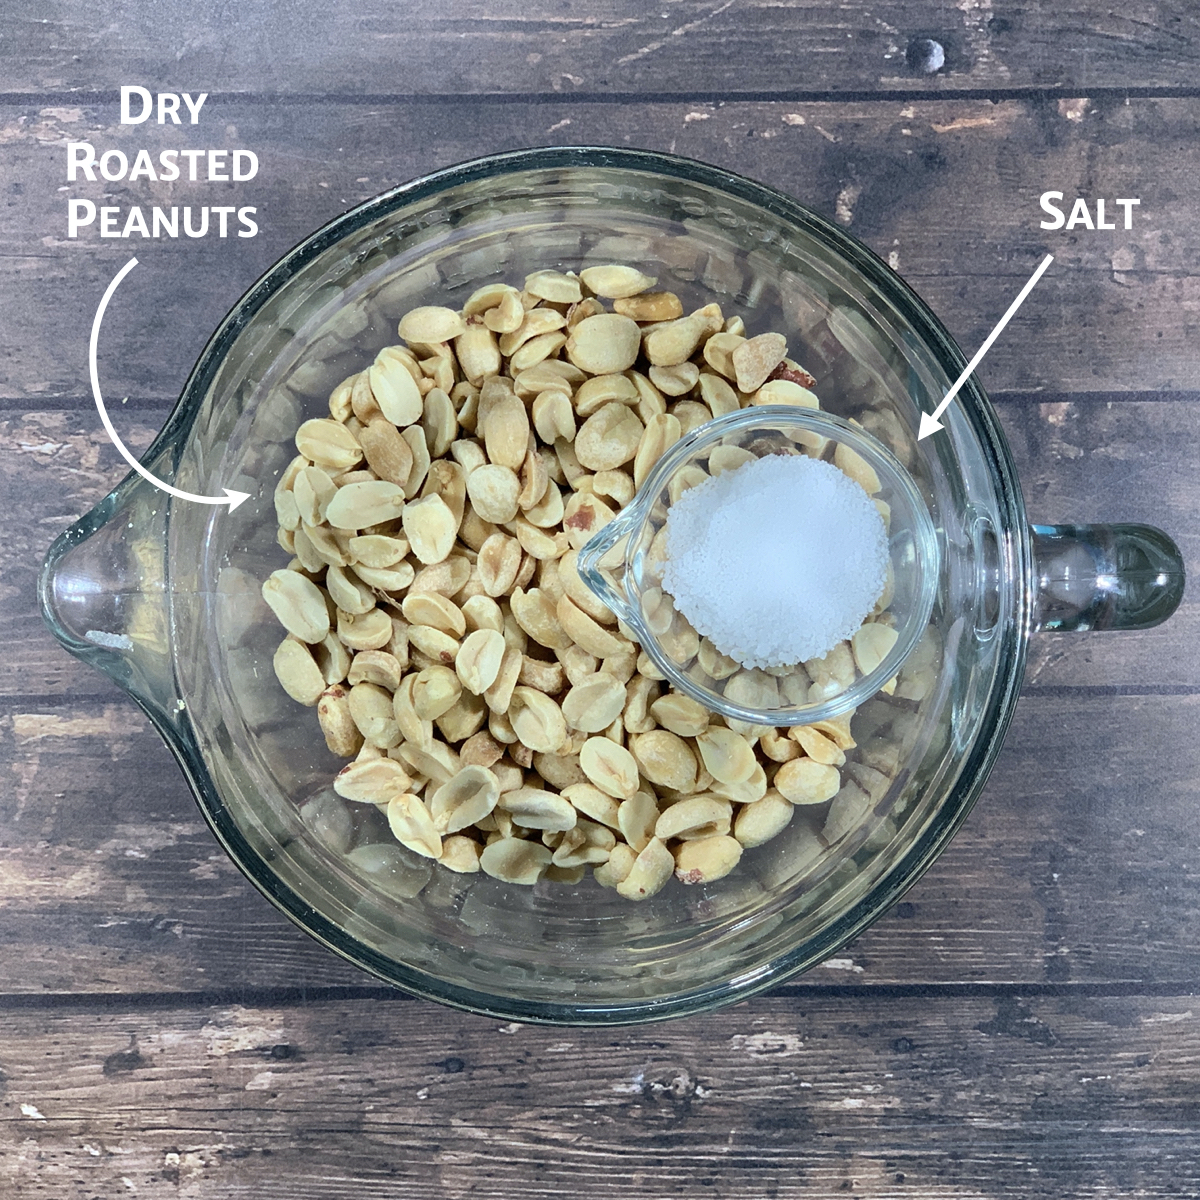
Homemade Old-Fashioned Peanut Butter is just peanuts and salt. How simple is that?
Score one for modern appliances
Now pounding peanuts into paste would be the only method available to Claire (and hard to say three times fast!).
Luckily we have electricity. And with it, a food processor.
So for us, making peanut butter takes about five minutes, 10 if you count warming the already dry-roasted peanuts available in most supermarkets. Okay, 15 minutes if you’re roasting your peanuts from raw, but let’s not get carried away here.

From peanuts to peanut butter in five minutes
You might ask why I’m warming peanuts that are already roasted? It isn’t strictly necessary, but warming the oils in the nut itself allows for a creamier final product.
Also, I’m using unsalted, dry-roasted peanuts. If the jar doesn’t specify dry-roasted, the peanuts will likely be roasted with oil(s). I want to be able to control how much oil I add to my peanut butter, if any (more on that later).
Plus, Claire would have roasted her peanuts without additional oils. ‘Nuff said.
How to make peanut butter in a food processor
Here’s what to look for when processing peanuts into peanut butter:
- Pulse the peanuts a few times to start getting them chopped. For chunky peanut butter, this is when to remove about 1/3 cup of the chopped nuts and set them aside.
- Run the processor continuously for one minute, then stop and scrape down the sides of the bowl. The peanuts will look dry and grainy.
- Run the processor for another minute, then stop and scrape down the sides of the bowl. The peanuts will start clumping together. Peanut butter in the making.
- Run the processor for another minute, then stop and scrape down the sides of the bowl. Now it will start looking like thick, glossy peanut butter. Almost there!
- Add the salt or sweeteners (if using). Run the processor for one to two minutes more until the peanut butter is completely smooth and spreadable. If you set aside some of the chopped peanuts, quickly pulse them in.
That’s it!
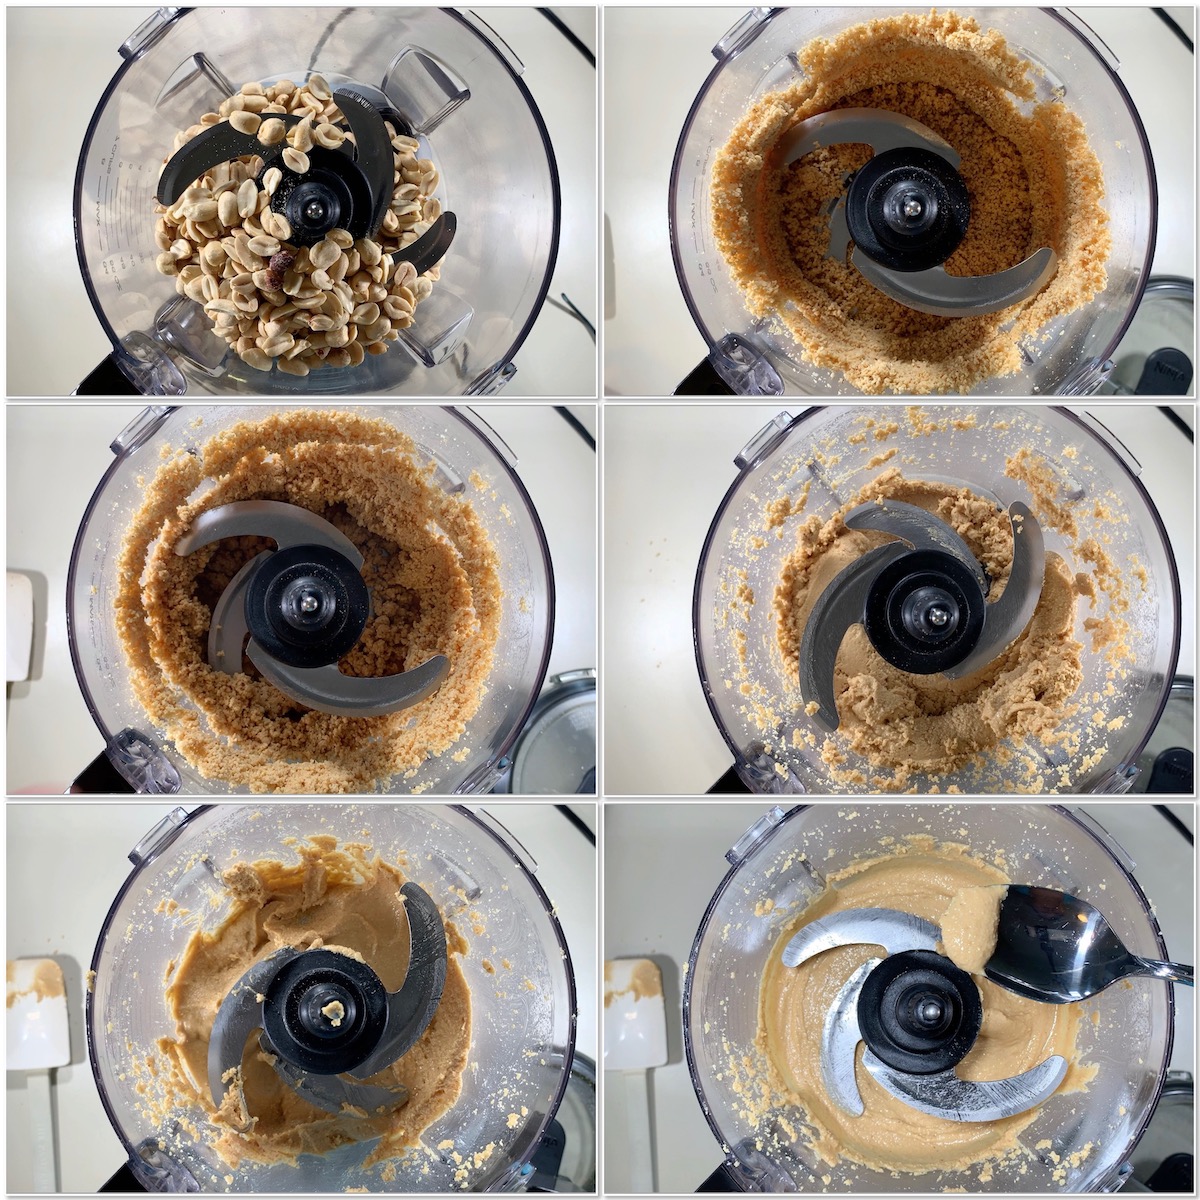
Making peanut butter is a matter of processing the peanuts through several stages, from dry & grainy to smooth & spreadable
A couple of comments here…
As I mentioned earlier, homemade creamy peanut butter isn’t as smooth as the commercial stuff. If you prefer, adding a tablespoon or two of a neutral oil when you add the salt and sweeteners will make it creamier. Peanut oil is best, but any unflavored oil will work.
Also, you don’t have to limit yourself to peanuts to have a homemade nut butter (especially if there’s a peanut allergy around). Almonds, cashews, sunflower seeds are but a few examples for viable alternatives. Use your favorite!
Peanut Butter Bliss
Like the Frasers, I couldn’t wait to try my homemade peanut butter. First I made a childhood favorite, a peanut butter and honey sandwich. No extra sweeteners needed!
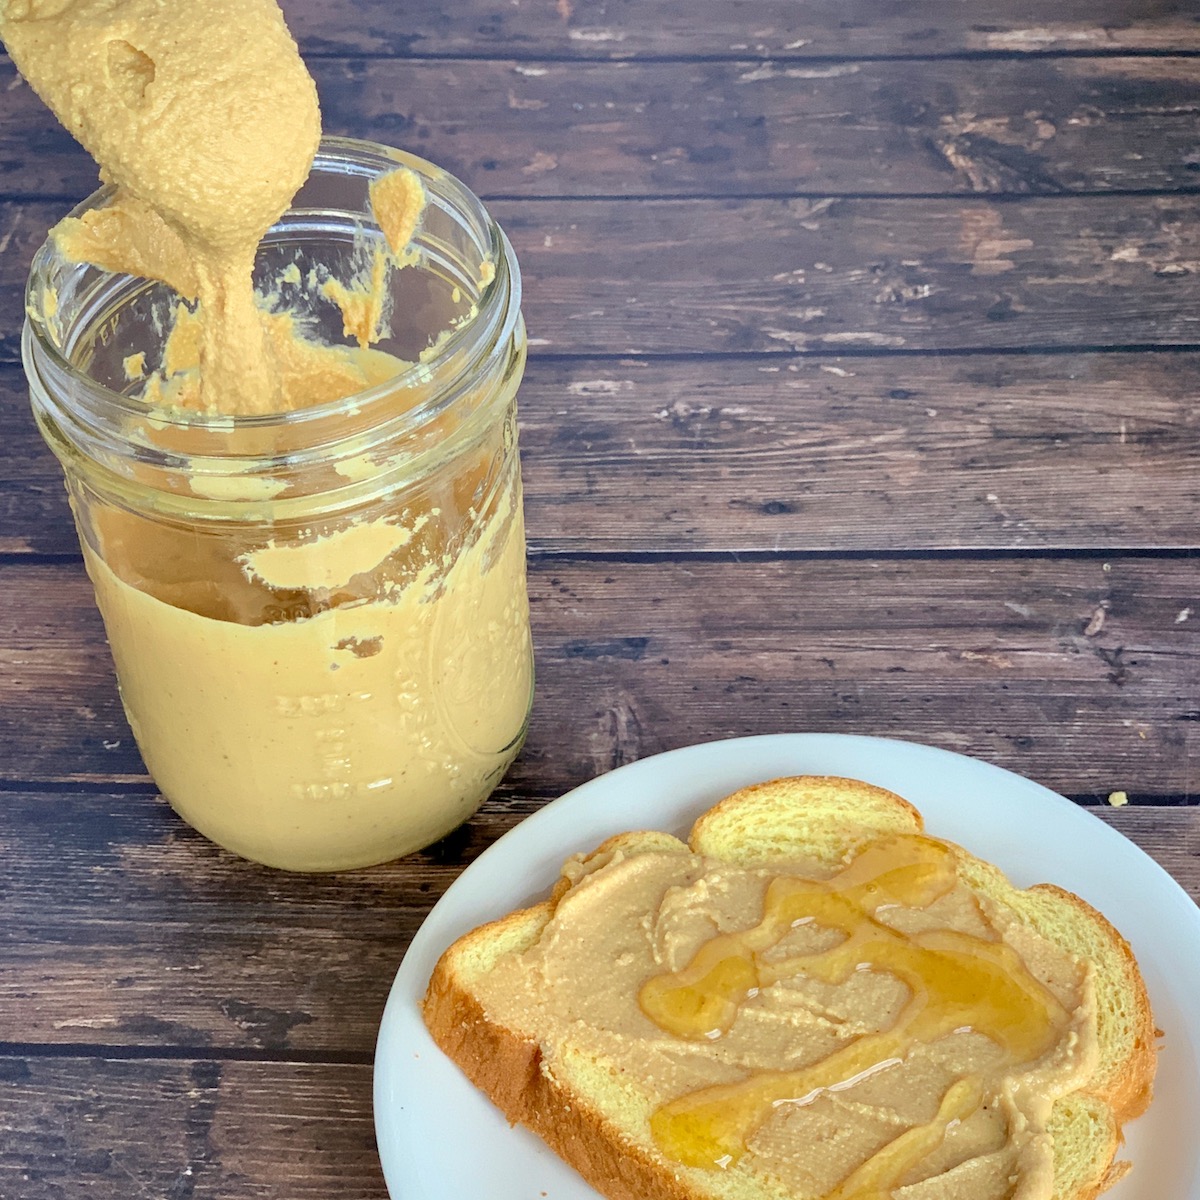
A peanut butter and honey sandwich is one of life’s pleasures
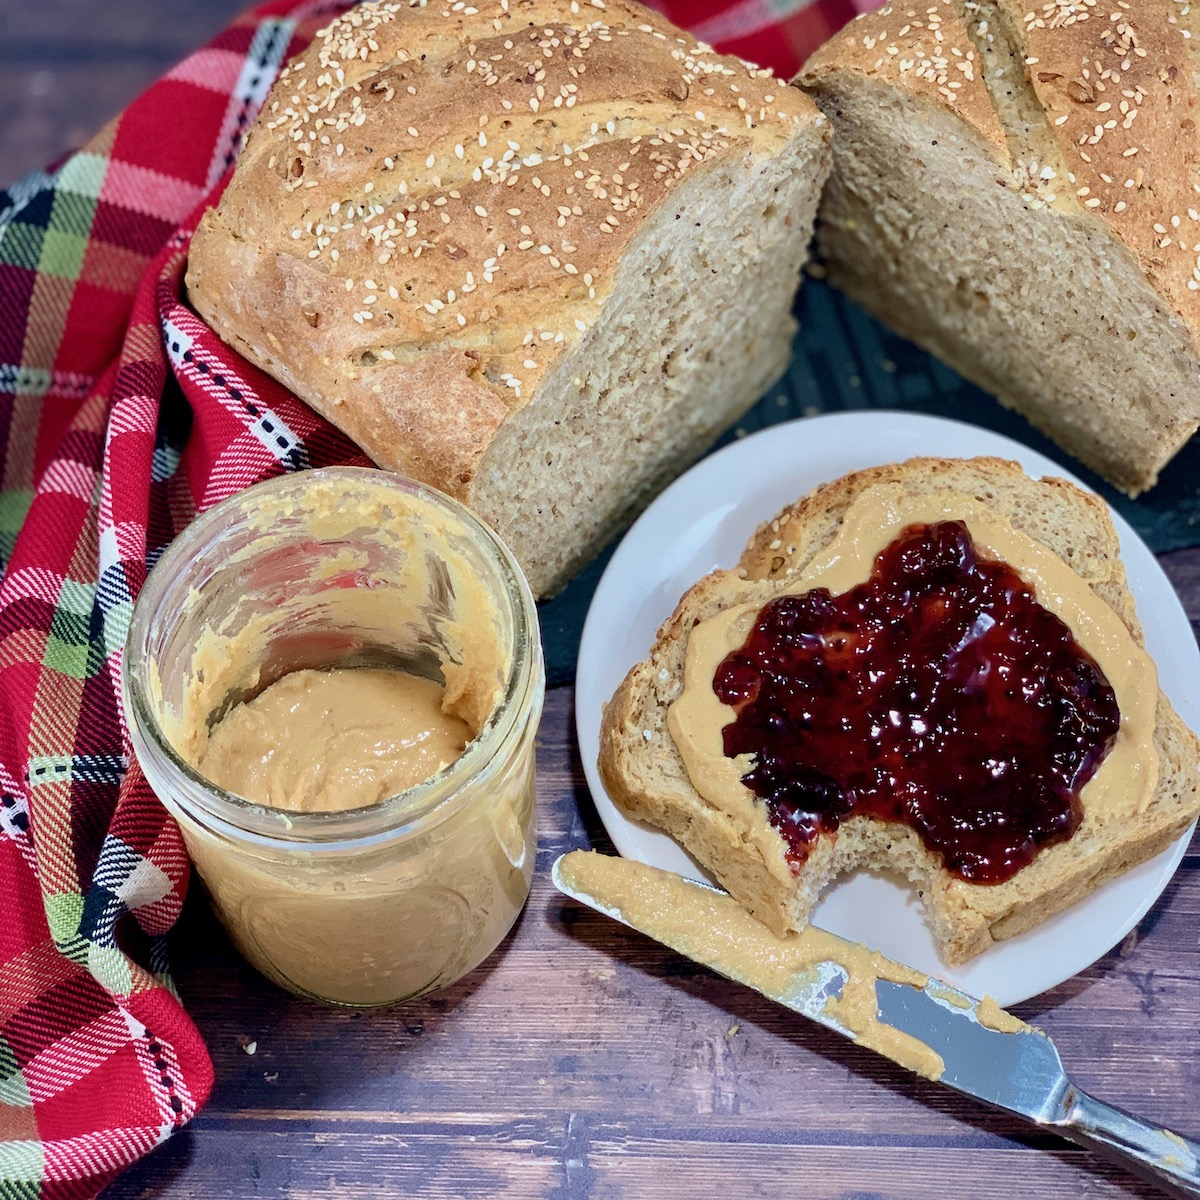
Then it was time to make a journey cake ala Claire.
I made a loaf of Multigrain Sourdough Bread and grabbed a jar of homemade strawberry jam that my sister had sent me. This sandwich was as authentic to Claire’s as I could recreate at home.
And how was it received? Well, first let’s remind ourselves of how Jamie tried his PB&J for the first time…
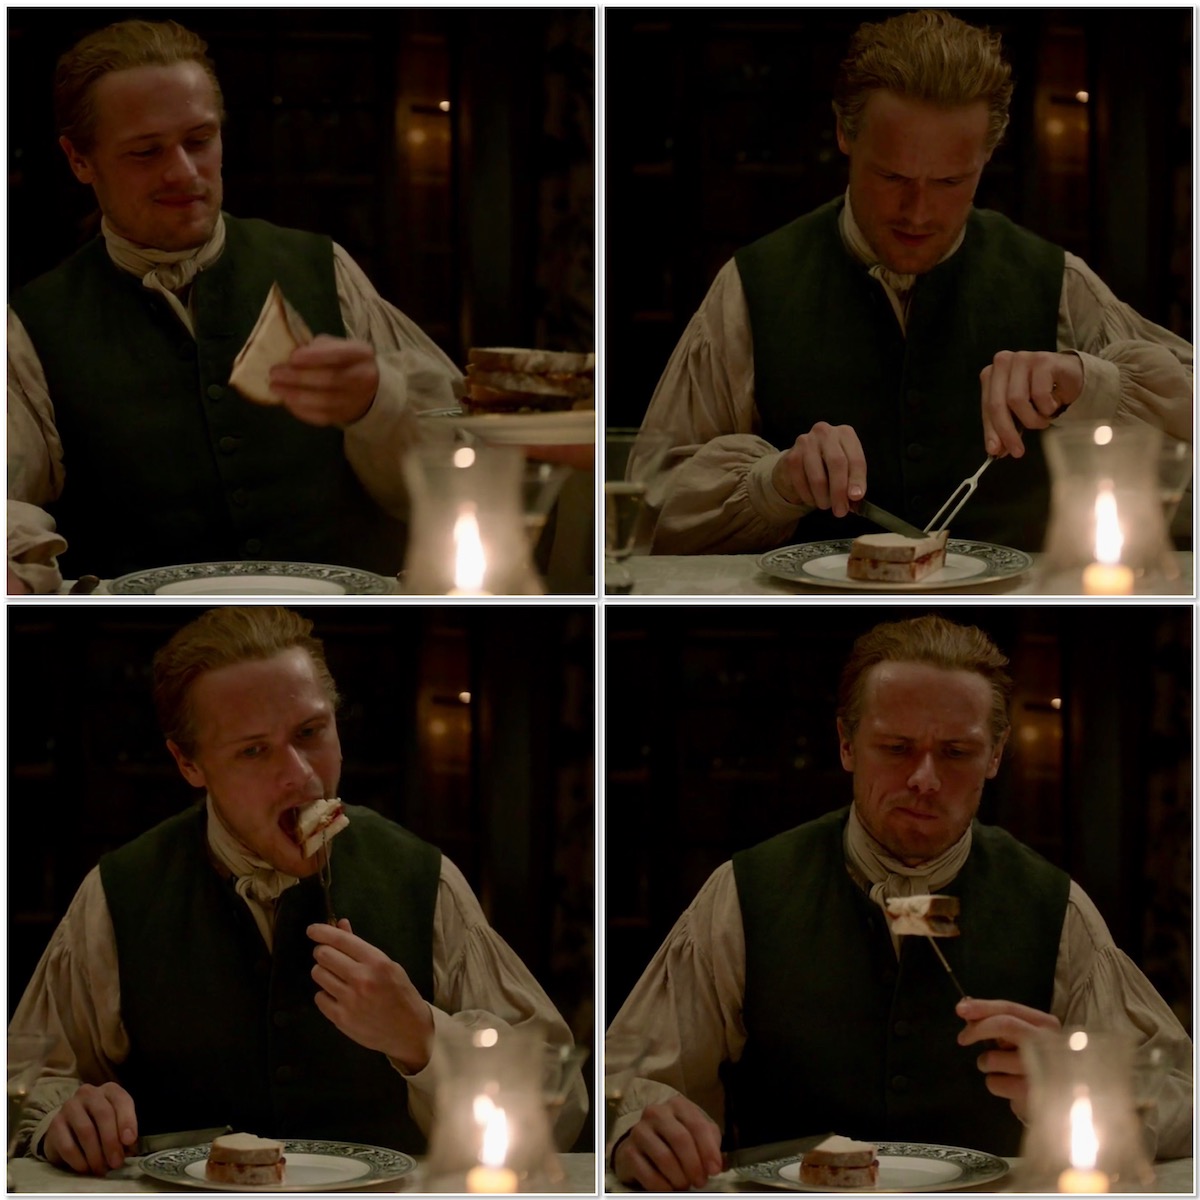
Jamie’s introduction to the pleasures of peanut butter and jelly sandwiches was priceless! (Photo credit: Outlander Starz Season 5)
Since Jamie ate his sandwich with a fork and knife, I couldn’t resist…
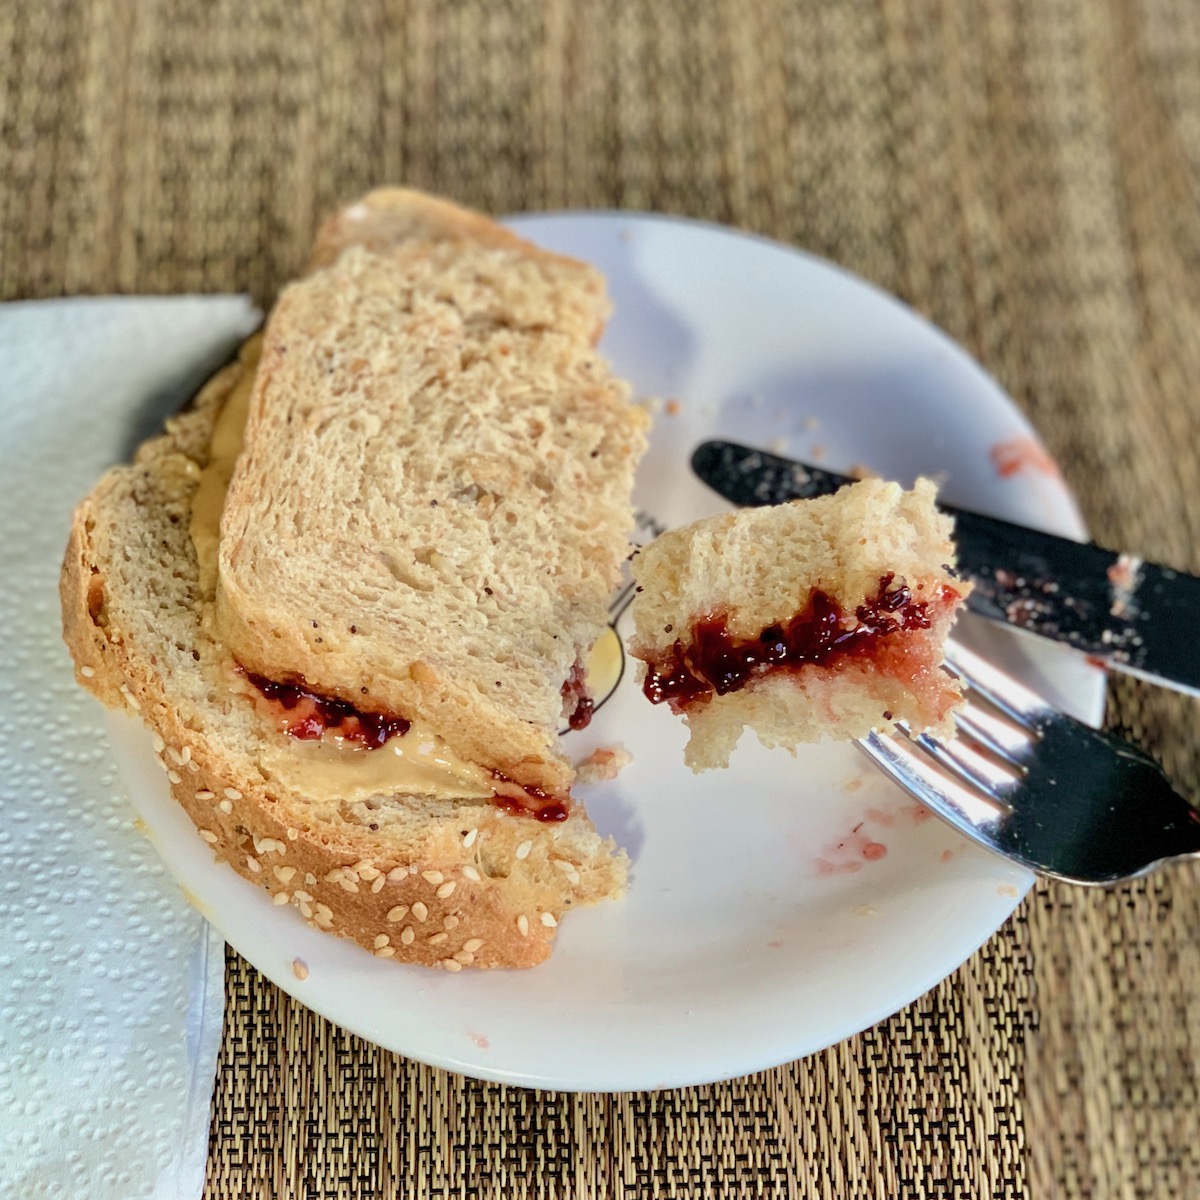
There’s more than one way to eat a PB&J sandwich
I think I’ll stick to eating sandwiches by hand.

I prefer to eat my sandwiches the way the rest of the Frasers do. (photo credit: Outlander STARZ Season 5)
My journey cake awaits
More than PB&J sandwiches
Peanut butter is such a flavorful ingredient, and there are so many ways it can be used. Peanut butter cookies or Thai peanut sauce are obvious choices.
You can also swirl a bit through softened chocolate or vanilla ice cream or through the batter for chocolate brownies before baking.
Or how about making another classic sandwich, New England’s Fluffernutter? It’s a peanut butter and marshmallow fluff sandwich, and I have just the recipe for homemade Marshmallow Creme ready.
I’m sure Claire and Brianna would have enjoyed one or two back in the day!
Slainté!
Do you like smooth or crunchy peanut butter? Is there another nut butter you like?
Old-Fashioned Homemade Peanut Butter

All it takes to make your own homemade peanut butter is peanuts and a few minutes with a food processor. Substitute any nut to make a butter to suit your taste. Easy and fun!
Adapted from The Kitchn
- 2 cups peanuts (unsalted and dry roasted, see Recipe Notes (8¾ oz, 250g))
- ½ tsp kosher salt (plus more to taste (optional))
- Arrange a rack in the middle of the oven and preheat to 350°F.
-
Place roasted peanuts on a half sheet baking pan lined with a Silpat silicone mat or parchment paper. Bake for 5 minutes. This step is optional but it helps to warm up the peanuts and loosen the oils for easier blending and a creamier finished product.
-
Place the warmed peanuts into the bowl of a food processor fitted with the blade attachment or blender. Pulse the peanuts a few times to start getting them chopped. For chunky peanut butter, remove about 1/3 cup of the chopped nuts and set aside.
-
Run the processor continuously for one minute, then stop and scrape down the sides of the bowl. The peanuts will look dry and grainy.
-
Run the processor for another minute, then stop and scrape down the sides of the bowl. The peanuts will start clumping together. Peanut butter in the making.
-
Run the processor for another minute, then stop and scrape down the sides of the bowl. Now it will start looking like thick, glossy peanut butter. Almost there!
- Add the salt (if using). See the recipe notes for making the finished peanut butter creamier or sweeter.
-
Run the processor for one to two minutes more until the peanut butter is completely smooth. Taste to adjust the saltiness (or texture or sweetness, if desired). Note, homemade peanut butter won’t be as smooth as commercial peanut butter, but it’s spreadable and yummy. Just think of all the preservatives, emulsifiers, and additives you’re not using!
- If you set aside some chopped nuts for chunky peanut butter, add them now and pulse a couple of times to incorporate into the finished peanut butter.
-
That’s it! Transfer to a clean jar and enjoy.
-
Homemade peanut butter will last refrigerated in a sealed container for several weeks.
A one pound (454g) jar of roasted peanuts contains between 3-4 cups, and your yield will go up to about 1-1/2 cups of finished peanut butter if you want to use the whole jar.
If you use raw peanuts, increase the roasting time to 10 minutes. Roasting is optional, but gives the finished peanut butter a deeper flavor. I avoided using peanuts that were already salted or roasted with peanut oil so that I could control the finished flavor and texture, but the choice is yours.
For creamier peanut butter, add 1 to 2 tablespoons peanut oil or other neutral oil when adding in the salt. Peanut oil is best, but any unflavored oil will work.
For sweeter peanut butter, add 1 to 2 tablespoons honey or other sweetener, again when adding in the salt.
Also, You don’t have to limit yourself to peanuts to have a homemade nut butter (especially if there’s a peanut allergy around). Almonds, cashews, sunflower seeds are but a few examples for viable alternatives. Use your favorite!
Did you make this recipe? Please share your pictures with the world on your social media channels. Tag @outlandercast (on Instagram and Twitter) and use the hashtag #howtheymadeitoutlander. I can’t wait to see your creations!
Discovering Outlander after Season 1 first aired, Tammy quickly went down the rabbit-hole on social media and podcasts and found a world of like-minded fans who not only tolerated her obsession, but encouraged the madness! She combined her Outlander-inspired interest for scotch whisky with her continuing passion for baking and storytelling in her blog, Scotch & Scones…Explorations in a glass and in the oven. Joining the staff of Outlander Cast as the resident baker has brought Tammy full circle, from a podcast fan to a contributing writer. You can follow her on Twitter, Instagram, and Pinterest at @scotch_scones, and find her on Facebook at @scotchandsconesblog.