Full spoilers for Outlander Season 3 Episode 5, “Freedom & Whisky.” This podcast page is spoiler-free for future book events beyond this episode.
In this episode of Outlander Cast, hosts Mary and Blake recap and react to Outlander Season 3 Episode 5, “Freedom & Whisky.” We discuss why Claire finally stops living a half-life, why Brianna giving Jamie back to her mother is the emotional center of the episode, why Roger works much better here, why Joe Abernathy sees Claire so clearly, how Sandy pushes Claire toward the truth, the Batman suit, the Boston Christmas of it all, and the print shop ending that makes the entire hour breathe again.
Quick answer: “Freedom & Whisky” is the episode where Claire chooses the life that makes her whole. Roger finds proof that Jamie survived and became a printer in Edinburgh. Brianna gives Claire permission to go back. Joe tells Claire that fate is something she can make. Sandy forces Claire to confront the years she spent living beside Frank without truly belonging there. And by the end, Claire walks into the print shop and sees Jamie again.
That is why the episode works emotionally. It is not just about finding Jamie. It is about Claire admitting that the life she built in Boston was real, but incomplete. She has been a surgeon, a mother, a widow, and a woman who survived. But without Jamie, she has also been living a half-life. “Freedom & Whisky” is the moment she finally lets herself stop.
Start With Our Outlander Season 3 Guide
This episode brings Season 3 to the edge of the print shop reunion and closes the Boston half-life chapter of Claire’s story. For every Season 3 podcast, recap, listener feedback episode, article, and explainer, start with our Outlander Season 3 Episode Guide.
Listen And Watch: Outlander Season 3 Episode 5 Recap & Reaction
Watch our full Outlander Season 3 Episode 5 recap and reaction for “Freedom & Whisky” below.
This episode of Outlander Cast covers Claire’s choice, Brianna’s permission, Roger’s role in finding Jamie, Joe Abernathy’s friendship, Sandy’s confrontation, the Batman theme, the Christmas setting, the Boston cream pie and lobster rolls, the Robert Burns title, and the long-awaited return to the print shop.
More Coverage For Freedom & Whisky
Want to keep going with this episode? These are the most directly related Outlander Cast pieces from our archive.
- Minute-By-Minute Recap: Freedom & Whisky: the full beat-by-beat breakdown of Episode 3.05.
- Freedom & Whisky Listener Feedback: the community reaction to Claire, Brianna, Roger, and the print shop ending.
- Freedom & Whisky: Burns’ Poem In Outlander Season 3: the meaning behind the episode title.
- Is Claire A Bad Mother For Choosing Jamie Over Bree? the central emotional debate of this episode.
Outlander Season 3 Episode 5 Recap: What Happens In Freedom & Whisky?
“Freedom & Whisky” picks up after Roger finds evidence that Jamie survived and was living in Edinburgh as a printer. Claire has spent years trying to accept the life she built after Frank, but Roger’s discovery reopens the door she had forced herself to close. Suddenly, Jamie is not just memory, grief, or possibility. He is findable.
The episode follows Claire as she wrestles with whether she can leave Brianna, her career, her home, and the twentieth century behind. Brianna, meanwhile, has to process the possibility that her mother may disappear into the past to find the father Brianna never knew. Roger arrives in Boston and becomes the catalyst for the choice, but the emotional permission has to come from Brianna.
By the end, Claire accepts the truth that everyone around her has been pushing her toward: she cannot keep living halfway. She prepares her own eighteenth-century outfit, returns through the stones, walks through Edinburgh, enters the print shop, and says the words the season has been building toward: “It’s me. Claire.”
Why Claire Stops Living A Half-Life
The phrase “half-life” is the soul of this episode. Claire has not been dead without Jamie, but she has not been fully alive either. She has built an impressive life in Boston. She became a surgeon. She raised Brianna. She had a real friendship with Joe Abernathy. She made a home. She survived.
But survival is not the same as wholeness.
That is what “Freedom & Whisky” finally admits. Claire’s twentieth-century life is not fake, and the episode is better because it does not pretend it is. Brianna is real. Joe is real. Frank was real. Claire’s work is real. But the part of herself that belongs with Jamie has been sealed off for twenty years, and the proof Roger brings forces her to look at that sealed door again.
The emotional question is not, “Does Claire love Jamie?” We already know that. The emotional question is whether Claire can give herself permission to live as the person she actually is, even if that means leaving behind the person she has spent twenty years trying to be.
Brianna Gives Jamie Back To Claire
The most important emotional scene in the episode is not the print shop ending. It is Brianna telling Claire to go. That scene gives the entire episode its moral permission. Without it, Claire leaving would feel like abandonment. With it, the choice becomes painful but honest.
Brianna understands that Claire gave Jamie up for her. That is the emotional equation. Claire left the eighteenth century pregnant, built a life with Frank, and raised Brianna because Jamie made her promise to survive. Now Brianna gives that gift back. She tells Claire that the most powerful thing Claire ever felt was Jamie, and she trusts that it must be the same for him.
That is not small. Brianna is not just saying, “Go be happy.” She is saying, “Tell him about me.” She is allowing Claire to carry Brianna to Jamie in story, memory, and truth. Claire cannot bring their daughter through the stones, but she can bring Jamie the knowledge that Brianna exists.
The Choice Should Hurt, And It Does
There is a fair criticism that Brianna may let Claire go a little too easily. A daughter who has already lost Frank, never knew Jamie, and only recently began to understand her mother should probably struggle harder with losing Claire too. That tension is real.
But the episode’s best defense is that Brianna’s permission is an act of love. She is trying not to burden Claire with visible guilt because she knows what this choice means. She knows Claire has lived with absence for decades. She also knows that holding Claire back would not make either of them whole.
The scene works because the love is adult. Brianna is not a child begging her mother to stay. She is a young woman recognizing that her mother had a life before her, a love before her, and a wound that Brianna can finally help heal. That does not erase the sadness. It makes the sadness cleaner.
Joe Abernathy Sees Claire Better Than Almost Anyone
Joe Abernathy is one of the reasons this episode works as well as it does. His friendship with Claire does not need a huge amount of screen time because the shorthand is so good. He can tease her, read her, challenge her, and tell her the truth in a way that feels earned.
That is why the “skinny white broad” exchange matters. It is funny, yes, but it also tells us how close they are. Joe is not just a colleague. He is Claire’s best friend in Boston, the person who can see through the professional mask and understand that something in her life has cracked open again.
Joe’s real gift is that he refuses to let Claire hide behind fate. He tells her to make her own fate. That matters because Claire has spent so much of her life having impossible things happen to her: the stones, Jamie, Frank, Culloden, Brianna, loss, survival. Joe pushes her toward agency. He sees the half-life, names it, and tells her she does not have to keep choosing it.
Sandy Is Annoying, But She Has A Purpose
Sandy showing up again could easily feel forced, and in some ways it does. But thematically, she serves a real purpose. She is the person who says the cruel thing Claire needs to hear: Frank loved her, and Claire wasted years with him that Sandy would have given anything to have.
Sandy is not fully right. Claire did not single-handedly ruin Frank’s life. Frank made choices too. Their marriage was not a simple story of Claire withholding and Frank suffering nobly. It was complicated, messy, compromised, and built around a truth neither of them could fully escape.
But Sandy does force the question: why is Claire still standing still? If loving someone matters that much, and if one more day with the person you love would be worth anything, then what is Claire doing in Boston when Jamie may still be alive in Scotland?
That is why Sandy works better as a thematic push than as a person. She is another voice from the universe telling Claire to stop living halfway.
Roger Finally Becomes A Character, Not Just A Plot Device
Roger has his strongest material so far in “Freedom & Whisky” because he finally acts from his own desire. He does not simply mail the information about Jamie. He gets on a plane, comes to Boston, and brings it himself. That matters because it turns him from researcher into participant.
His relationship with Brianna also works better here because the episode gives them actual texture. The lobster rolls, Boston cream pie, Christmas gift, couch posture, and honest conversation about fathers make the connection feel more natural than it has before. Roger and Brianna are not just two young people placed next to each other because the plot needs them there. They start to feel like two people building a language.
The best moment is Roger pushing back on Brianna’s frustration about history and fatherhood. He knows something about being raised by someone who is not his biological father. He knows that love and parenthood are not only blood. That gives him the authority to challenge her gently, and it finally gives their dynamic some spark.
Brianna Mourning Frank Makes Her Feel Real
One of the strongest Brianna moments is quiet: the pipe, the photos, Frank’s theme, and the memory of the father who raised her. The episode does not need a huge grief monologue. It only needs to show Brianna touching the physical remnants of Frank’s life and realizing what she has lost.
That matters because Brianna’s grief can get swallowed by the larger Jamie/Claire engine. But Frank was her father. He raised her, loved her, shaped her, and gave her a daily life. The pipe scene honors that without pulling the episode away from Claire’s choice.
It also helps clarify why Brianna’s permission matters. She is not telling Claire to go because she feels nothing. She is telling Claire to go while carrying her own grief. That makes the choice more generous, not less.
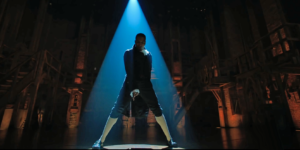
The Batman Suit Is Silly, But It Works
The Batman material should be ridiculous. Claire making her own time-travel utility suit overnight, complete with pockets and practical considerations, could easily tip into parody. But the episode knows it is a little silly, and that self-awareness helps.
More importantly, the Batman idea works thematically. Batman is a character built around masks, dual identities, and the question of which self is real. Is Bruce Wayne the mask, or is Batman the mask? That is exactly Claire’s question in this episode.
Is Claire the Boston surgeon, widow, mother, and modern woman? Or is Claire the woman who belongs with Jamie in the eighteenth century? The answer is not simple because both selves are real. But one of them is incomplete without the other. The suit becomes more than a costume. It is Claire preparing to step back into the life that makes her whole.
The Makeup Scene Shows Claire Removing The Mask
One of the most important visual ideas in “Freedom & Whisky” is Claire looking at herself without makeup. Season 3 has used her twentieth-century styling almost like armor: composed, professional, controlled, and polished. The makeup is part of the life she has constructed.
When Claire looks at herself bare-faced, she is not simply getting ready to travel. She is asking who she is underneath the mask. The surgeon, the widow, the mother, the woman who survived Boston — those identities matter. But the woman staring back at her is also the woman who still loves Jamie.
That is the emotional logic of the episode. Claire does not go back because the past is easier. She goes back because she finally recognizes herself again.
The Puddle Transition Is The Right Choice
Claire stepping into the puddle and emerging in the eighteenth century is a clean, elegant transition. The show does not need to spend extra time showing the stones again. We have seen that. We understand the mechanism. What matters now is not the process of time travel. It is the emotional fact of return.
The puddle works because it lets the episode move on instinct. Claire steps out of one world and into another. The modern street becomes the past. The woman who has been living in Boston becomes the woman walking toward Jamie. The transition is simple because the choice has already been made.
That is good adaptation. Sometimes the right move is not to show every step. It is to trust that the audience knows what the step means.
The Print Shop Ending Lets The Episode Exhale
The final scene works because the episode builds tension and then releases it in the most human way possible. Claire walks up the stairs, reaches the door, hears Jamie’s voice, and enters the room. The entire season has been moving toward this moment.
Then Jamie faints.
That is the perfect release valve. The moment is romantic, emotional, and huge, but the faint keeps it from becoming too precious. It reminds us that these are people, not symbols. Jamie has imagined, mourned, buried, and carried Claire for twenty years. Seeing her again should not produce a perfectly composed romantic line. It should short-circuit his body.
The faint works because it is funny and emotionally honest at the same time. The show builds the breathless reunion and then lets us laugh without undercutting the feeling. That is a very hard balance, and “Freedom & Whisky” lands it.
Why Freedom & Whisky Matters For Season 3
“Freedom & Whisky” matters because it ends the waiting part of Season 3. The first four episodes show Jamie and Claire living separate lives, shaped by grief, duty, time, family, and survival. This episode is the pivot. It turns searching into choosing.
Claire chooses to go. Brianna chooses to let her. Roger chooses to help. Joe chooses to tell Claire the truth. Sandy, intentionally or not, chooses to wound Claire into motion. Every major character around Claire pushes her toward the same realization: the life she has is not the life that makes her whole.
That is why the episode’s title feels right. Freedom and whisky. A toast. A poem. A clue. A release. Claire is not escaping responsibility. She is accepting the cost of finally being honest about who she is.
Mary & Blake’s Kilt Ratings For Freedom & Whisky
Blake gave “Freedom & Whisky” 4.5 kilts, praising the honest character moments between Claire and Brianna, Brianna and Roger, Claire and Joe, and finally Claire and Jamie. His biggest frustration was that the episode sometimes spells out its themes too directly, especially in the “what is history?” conversation, and that Claire’s biggest decisions often get softened by other people giving her permission.
Mary landed even higher, calling it basically a five-kilt episode despite the blood and guts at the opening. The Christmas setting, Claire’s return, the emotional honesty with Brianna, and the print shop ending made the episode feel joyful, cathartic, and deeply satisfying.
That split actually captures the episode well. Some of the dialogue is too on-the-nose. Some choices are a little convenient. But emotionally, “Freedom & Whisky” does what it needs to do. It lets Claire stop surviving and start moving.
Outlander Season 3 Episode 5: The Craft Verdict
“Freedom & Whisky” works because it understands that the print shop reunion cannot simply be a plot destination. Claire has to earn the walk up those stairs emotionally. The episode gives her a series of mirrors: Joe, Sandy, Brianna, Roger, Frank’s memory, and her own reflection. Each one asks the same question in a different way: who are you when you stop pretending this life is enough?
The episode is not perfect. Some dialogue is too literal. The Paul Revere/history metaphor works better before the show explains it. Brianna’s emotional permission could have used more tension. But the larger emotional architecture is right.
Claire has been living a half-life. “Freedom & Whisky” lets her choose the whole one. And when Jamie hits the floor at the end, it feels like the season finally gets to breathe.
Related Outlander Coverage
- Outlander Season 3 Episode Guide: every Season 3 podcast, recap, listener feedback episode, and explainer.
- Minute-By-Minute Recap: Freedom & Whisky: the full beat-by-beat breakdown of Episode 3.05.
- Freedom & Whisky Listener Feedback: more reaction to Claire, Brianna, Roger, Joe, and the print shop.
- Freedom & Whisky: Burns’ Poem In Outlander Season 3: the meaning behind the episode title.
- Is Claire A Bad Mother For Choosing Jamie Over Bree? the central emotional debate of this episode.
- Minute-By-Minute Recap: A. Malcolm: continue directly into the print shop reunion.
- The Anxiety Of Being Jamie Fraser: another look at the print shop aftermath.
- The Signs And Symbols In A. Malcolm’s Print Shop Sign: what the print shop tells us before Jamie says a word.
- Ready To Cry? Matt B. Roberts On The Print Shop & More: more context for the reunion everyone waited for.
- Outlander Timeline Explained: Claire, Jamie, Culloden, the 20-year separation, and the split across centuries.
- Outlander Cast Podcast Hub: browse all of our Outlander recaps, reactions, interviews, and listener feedback episodes.
Go Deeper With Mary & Blake
Love the craft, character, and emotional analysis behind Outlander? We go deeper on the show in Outlander Cast and inside The Nerd Clan, where members get bonus episodes, Blake’s Book Club, extra analysis, community discussion, and more.
What did you think of “Freedom & Whisky”? Did Claire have to go back, or did Brianna let her go too easily?